When homeowners realize they may need foundation repair, the first question is usually not “how,” it is “how long.” People want to know what the process looks like, how disruptive it will be, and what happens first. That is completely normal. Foundation problems can feel intimidating because they affect the structure of the home, and most homeowners do not deal with them often.
The good news is that professional foundation repair is typically a step-by-step process. A reputable contractor does not jump straight to major work. The job starts with understanding the symptoms, identifying the underlying cause, and choosing a repair strategy that fits the home, the soil conditions, and the type of foundation. From there, stabilization is planned and executed in a controlled way, often with less disruption than homeowners expect.
In this guide, we will walk through the typical foundation repair timeline from the first inspection to final stabilization. We will also explain what can speed the process up, what can slow it down, and how homeowners can prepare so the job goes smoothly.
Key Takeaways
- Foundation repair starts with diagnosis: the goal is to identify why the foundation is moving, not just where cracks are.
- The timeline depends on the problem type, the repair method, and site conditions, but most projects follow a clear sequence.
- Stabilization methods like piers, wall reinforcement, or structural repairs are often paired with moisture and drainage recommendations.
- Preparation and access can reduce disruption and help the job move efficiently.
- The best long-term results come when structural repair is paired with water and soil condition improvements.
Step 1: The Initial Call and Symptom Review
Before anyone measures a wall, the process begins with your observations. Homeowners usually contact a foundation repair company after noticing signs like:
- Cracks in basement walls or exterior brick
- Bowing or bulging foundation walls
- Doors and windows sticking
- Floors sloping or feeling uneven
- Water intrusion or persistent dampness
At this stage, a professional may ask simple questions to understand the pattern:
- When did you first notice the issue?
- Has it gotten worse?
- Does it change seasonally?
- Have you had water problems or flooding?
This information helps the inspector know what to look for and may suggest whether the issue is settlement, heave, lateral pressure, or a combination.
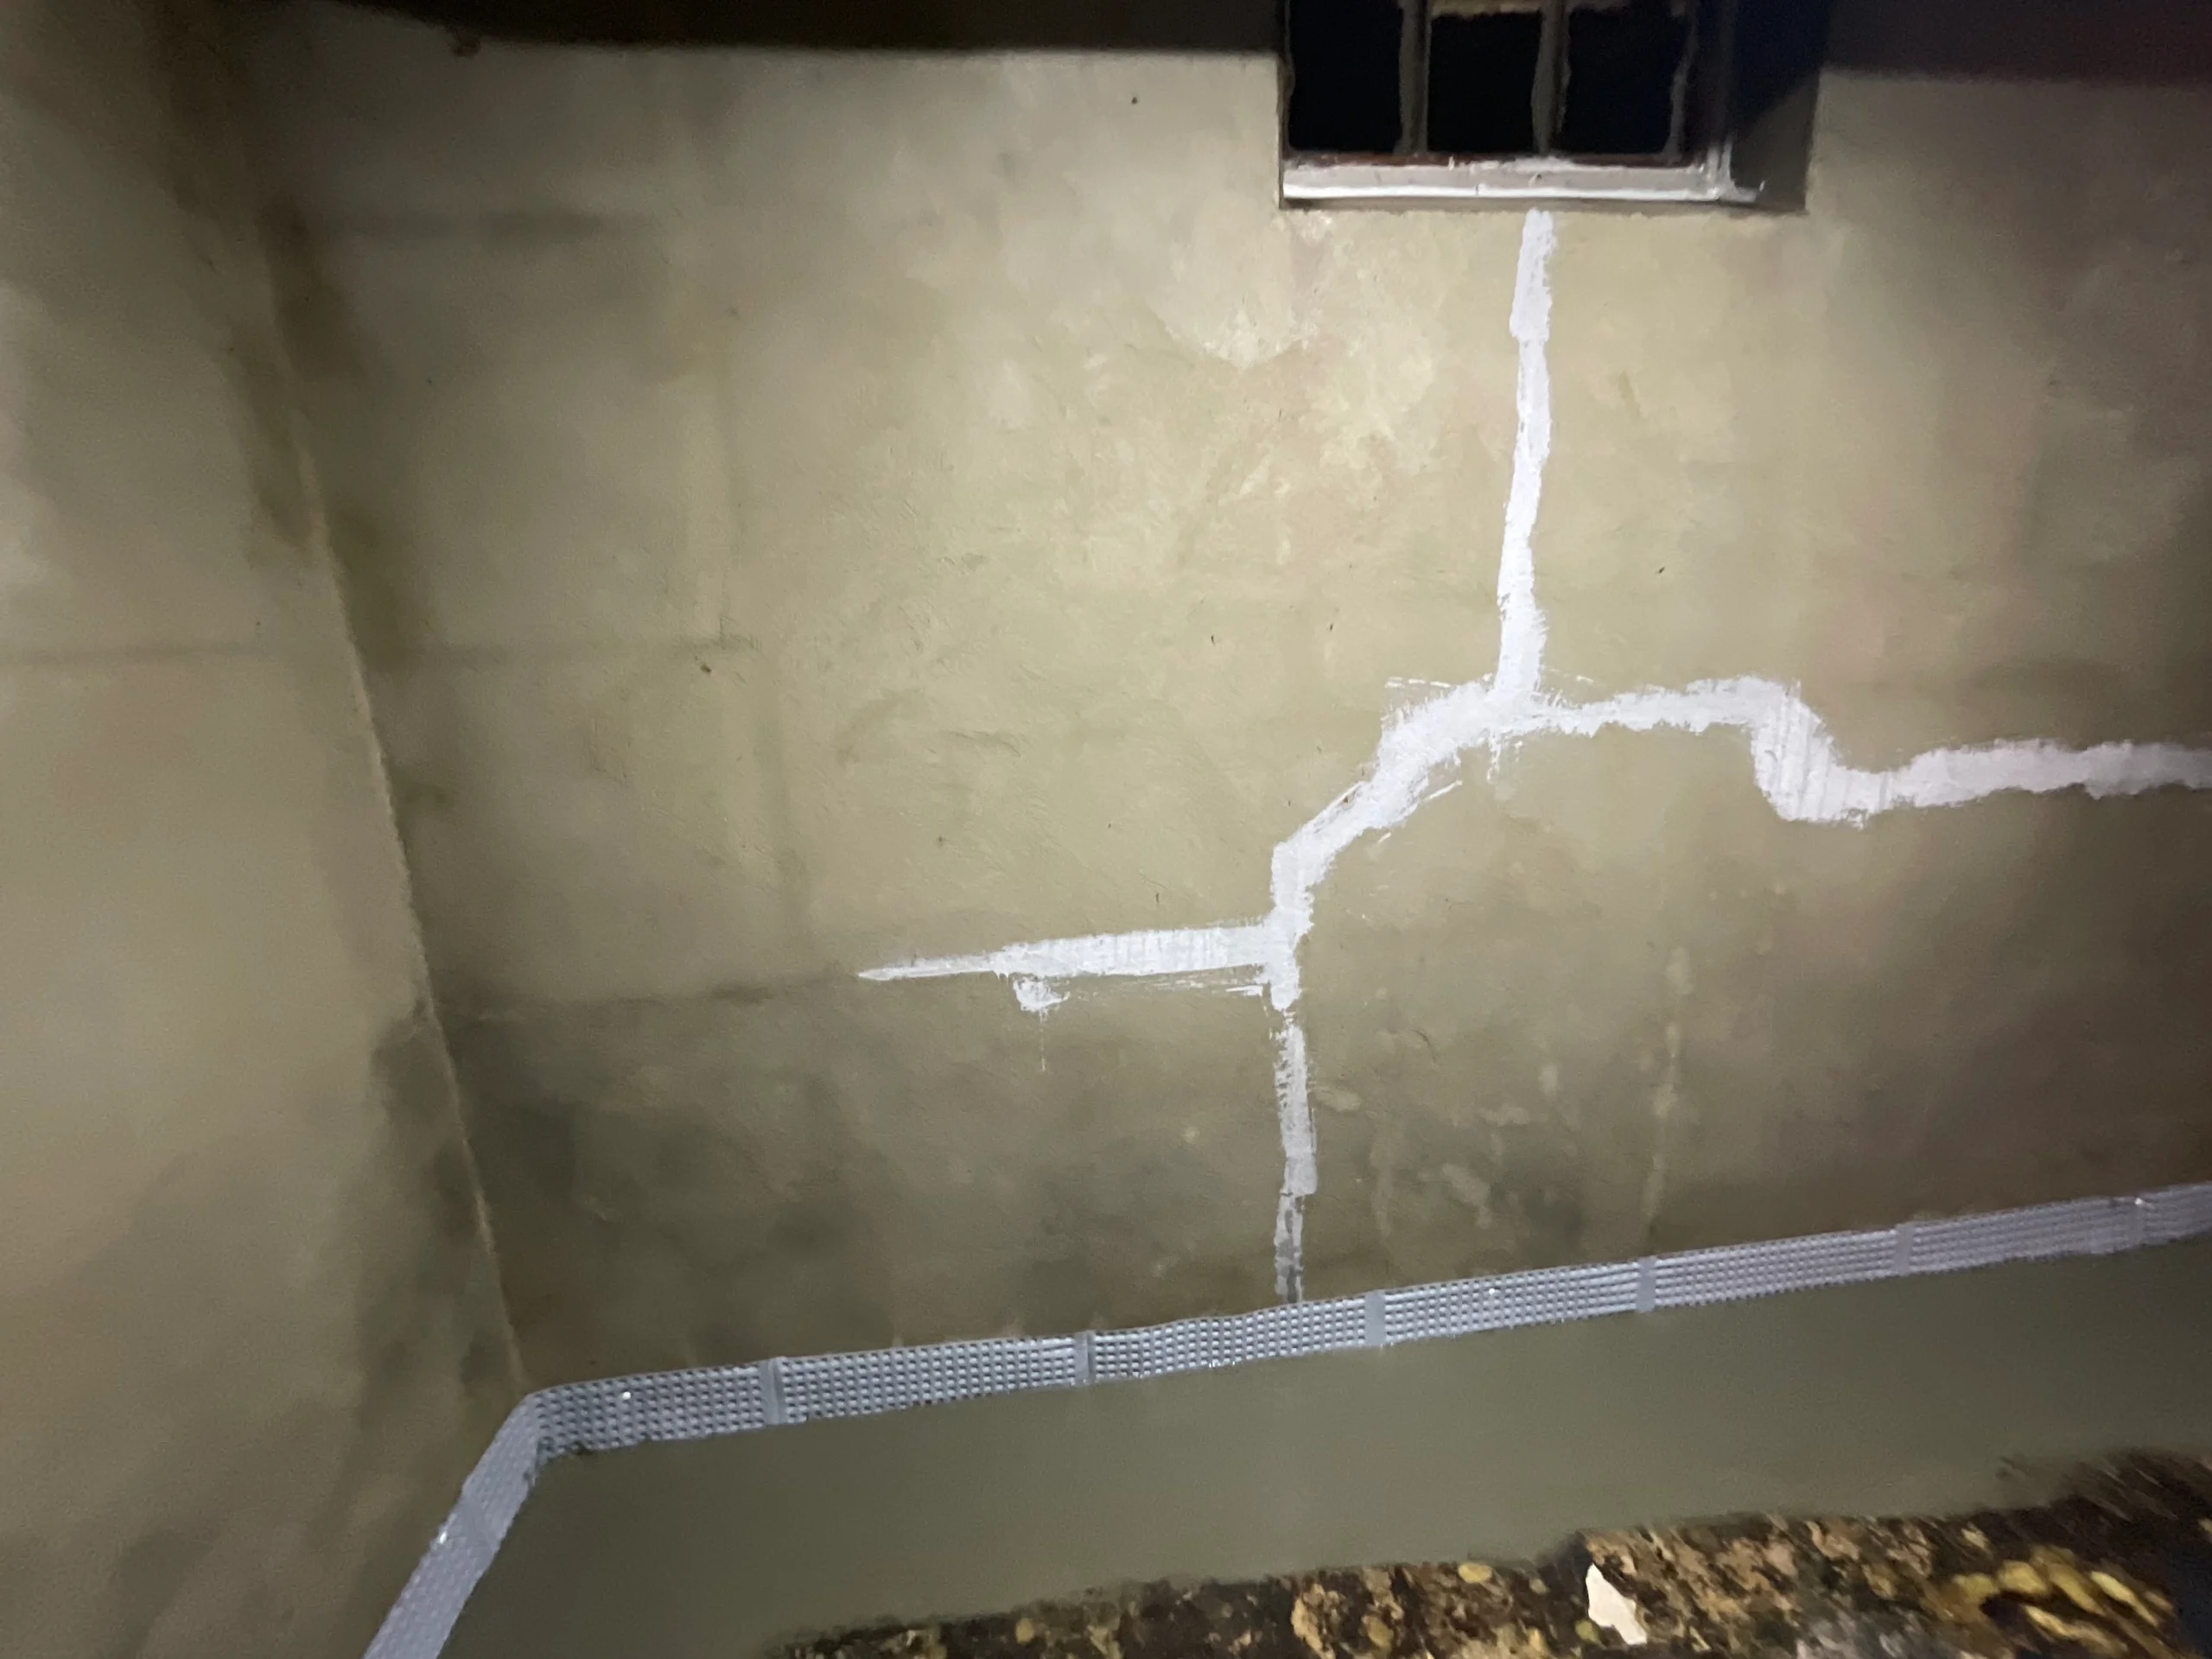
Step 2: On-Site Inspection and Evaluation
A proper foundation inspection is more than a quick glance at a crack. Professionals typically assess both structural and moisture-related factors.
What a thorough inspection often includes
- Visual assessment of foundation walls and floor conditions
- Crack pattern analysis: direction, location, width, and displacement
- Checking for bowed walls or inward movement signs
- Identifying water intrusion patterns or damp zones
- Evaluating exterior drainage: downspouts, grading, pooling areas
- Measuring floor elevation changes to map settlement patterns
- Reviewing crawl space conditions if applicable, including moisture and framing
The goal is to understand the home as a system. Foundation movement rarely happens without contributing factors such as soil changes or moisture patterns.
Step 3: Diagnosis and Repair Recommendation
After inspection, a reputable contractor explains:
- What is happening structurally
- What likely caused it
- Which repair options fit your situation
- What the expected outcome is: stabilization, partial lift, wall support, moisture reduction
This is where the plan becomes specific. Two houses can have cracks that look similar but need different repairs because the underlying cause is different.
Common repair categories
Depending on what is found, the recommendation may involve:
- Settlement stabilization with helical piers or push piers
- Wall stabilization with carbon fiber, steel beams, anchors, or tiebacks
- Structural repair for compromised areas or support systems
- Moisture and drainage improvements to reduce pressure and recurrence risk
A good recommendation will focus on long-term stability, not just cosmetic improvements.
Step 4: Planning and Scheduling the Work
Once you approve the plan, the contractor schedules the work and prepares the job scope. The scheduling timeline can vary depending on:
- Season and weather conditions
- Availability of materials and crew
- Permit requirements in some jurisdictions
- Complexity of the project
What homeowners can do during planning
- Clear storage away from the repair area in the basement or crawl space
- Make sure pets and children have safe separation from work zones
- Confirm access points for equipment and materials
- Ask what will be needed for exterior access if excavation or anchors are involved
Good planning reduces disruption and keeps the project moving.
Step 5: Pre-Work Preparation at the Site
On the day work begins, professionals often do a final walkthrough. This may include:
- Confirming work zone boundaries
- Protecting certain surfaces or pathways
- Reviewing the plan and answering final questions
- Identifying any unexpected issues that could change approach
In some cases, crews may also mark locations for pier placement, wall reinforcement positions, or structural support corrections.
Step 6: Performing the Foundation Repair Work
This stage is what most homeowners picture when they hear “foundation repair.” The exact work depends on the chosen method.
If the repair is pier installation for settlement
The work generally includes:
- Accessing foundation footing areas where piers will be installed
- Installing helical or push piers to stable bearing conditions
- Attaching brackets to transfer structural load
- Stabilizing the structure and, when appropriate, attempting controlled lift
Many homes require multiple piers to support the affected area. The number and placement depends on load and settlement pattern.
If the repair is basement wall stabilization
Work may include:
- Installing carbon fiber straps for reinforcement
- Installing steel bracing systems
- Installing wall anchors or helical tiebacks (may involve exterior yard access)
The goal is to stop continued movement and restore structural safety margins.
If the repair involves structural reinforcement
This could include:
- Strengthening compromised wall sections
- Correcting support elements like beams or posts
- Reinforcing areas affected by long-term movement
The main objective is always stabilization, not just crack appearance.
Step 7: Moisture and Drainage Corrections (Often Recommended)
Depending on what caused the issue, professionals may recommend improvements that reduce future risk.
Common examples include:
- Downspout extensions and gutter corrections
- Grading improvements to move water away from the home
- Drainage solutions to reduce saturated soil pressure
- Basement water management strategies when seepage is present
- Crawl space moisture control and vapor management recommendations
This step is often what makes foundation repair last. If water keeps building pressure against the home, movement can reappear in other areas over time.
Step 8: Post-Work Review and Homeowner Guidance
After installation and stabilization, professionals typically review:
- What work was completed
- What areas to monitor over time
- Any recommended next steps for moisture control or prevention
- What changes to expect in the home as it adjusts
A practical reality: your home may “settle into” stability
Some minor cosmetic cracks may remain, and doors may need slight adjustment after stabilization. The important point is that the structure is now supported properly and is less likely to continue shifting.
Step 9: Long-Term Monitoring and Maintenance
Foundation repair is a long-term investment. After stabilization, homeowners typically benefit from:
- Monitoring cracks for change
- Keeping water management systems maintained
- Checking downspouts and grading seasonally
- Addressing basement humidity or seepage issues promptly
- Scheduling periodic inspections if the home had significant movement history
The goal is to keep the soil environment stable and reduce repeat stress on the structure.
What Can Speed Up or Slow Down the Timeline?
Factors that can speed up a project
- Easy access to the foundation area
- Clear work zones without heavy storage
- Favorable weather and soil conditions
- A straightforward repair plan with no surprises
Factors that can slow down a project
- Limited access in tight crawl spaces or finished basements
- Saturated soil conditions after heavy storms
- Need for exterior excavation or anchor systems in restricted yards
- Unexpected structural conditions discovered during work
- Scheduling limitations during peak seasons
Even when timelines vary, a reputable contractor will keep you informed and explain changes clearly.
How to Prepare Your Home for Foundation Repair
Preparation can reduce stress and help the job go smoothly.
Helpful homeowner preparation steps
- Move stored items away from walls where work will occur
- Clear a path for technicians and materials
- Identify any delicate items that could be affected by vibration
- Make sure utilities and sump pump areas are accessible if needed
- Ask about noise and dust expectations so you can plan accordingly
You do not need to overdo it. Most of the work is handled by the crew, but access and space make a big difference.
Frequently Asked Questions
How long does a typical foundation repair project take?
It depends on the scope and method. Many stabilization projects follow a predictable sequence, inspection, planning, installation, and review. The timeline can vary based on access, soil conditions, and the repair strategy.
Will I need to leave my home during foundation repair?
In many cases, no. Most foundation repairs can be completed while you remain in the home, especially if work is localized. Larger projects may require certain safety precautions or temporary access adjustments.
Will foundation repair fix all cracks immediately?
The main goal is stabilization. Some cracks may remain and can be addressed cosmetically afterward. If movement stops, cosmetic repairs are more likely to hold.
Can foundation repair improve sticking doors and uneven floors?
Often yes. Stabilization can reduce ongoing movement, and in some cases partial lift can improve alignment. Some small adjustments may still be needed after structural stabilization.
Is drainage correction really necessary?
Often yes. If water and soil conditions contributed to movement, improving drainage helps protect the foundation from future stress and supports long-term results.
Conclusion
Foundation repair is not a single event, it is a process. It begins with a careful inspection and a clear diagnosis, then moves into planning, stabilization work, and long-term moisture and soil management. The timeline can vary depending on the repair method and site conditions, but reputable contractors follow a structured sequence that keeps the job organized and effective.
If you are seeing cracks, sticking doors, sloping floors, or basement wall movement, professional evaluation is the best first step. With the right repair strategy and moisture control plan, foundation stabilization can protect your home’s structure, preserve its value, and give you confidence that the problem is truly solved, not just temporarily covered.
For more than a decade, we have been the go-to waterproofing and related services provider for homeowners across New Jersey. Our reputation has been built on a foundation of delivering exceptional workmanship and top-notch customer service to each and every one of our valued clients.
We truly understand the significance of your home to you and your family, as well as the importance of the services we offer in safeguarding your home. That’s why we take our responsibilities seriously and never compromise on the quality of our work. Our commitment to your satisfaction is unwavering, and we go above and beyond to ensure that you are completely content with every aspect of the job we perform.
When it comes to protecting your home, trust is of utmost importance. At our professional New Jersey Waterproofing Company, we prioritize the well-being of your basement and ensure it remains shielded from any harmful moisture damage, regardless of the job’s size. Whether you require waterproofing, mold remediation, or even foundational or structural repairs, we are always ready and eager to take on any challenge.
Our singular focus is your happiness, and we leave no stone unturned in achieving it. If you are searching for a trustworthy New Jersey waterproofing company to safeguard your home, look no further. Contact us today and experience firsthand what sets us apart from the competition. Your home’s protection is our major priority, and we are here to serve you with dedication and expertise.